

Activate a VPOS Media Device
Activation runs from the device screen and a landing page, and it takes an email address you can receive a verification code at.1
Scan the QR Code
Scan the QR code shown on the device screen with your phone’s camera.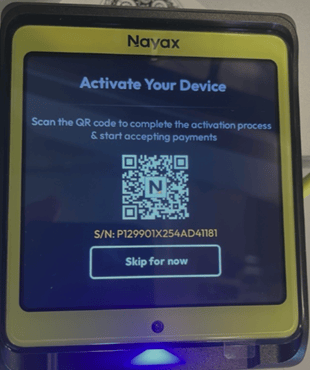
2
Fill In the Landing Page
The QR code opens a landing page. Enter the requested details and submit
the form.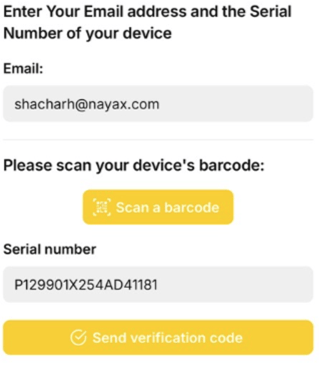
3
Enter the Verification Code
A verification code arrives by email. Enter it on the landing page to
finish activating the device.
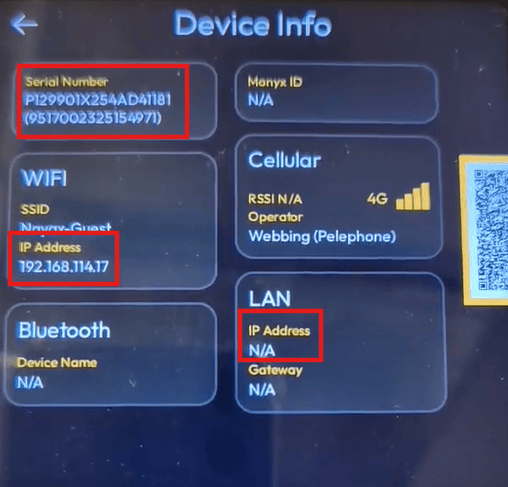
Find the Device’s Serial Number and IP
The device reports its own identifiers and network state from a hidden menu, so you do not need Nayax Core to read them. Tap the top-left corner of the screen repeatedly until the menu appears.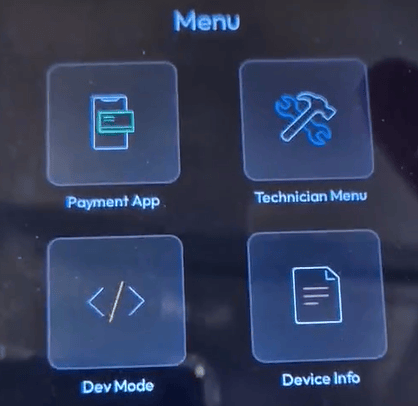
Configure Wi-Fi, Ethernet, and Static IP
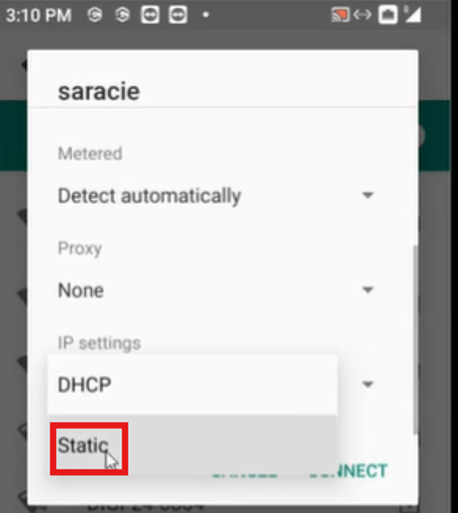
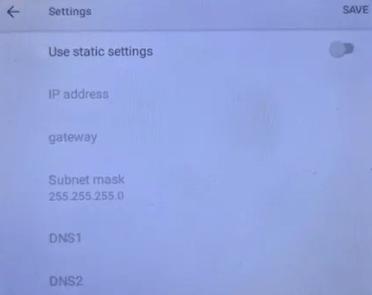
You reach the device’s network settings from the same hidden menu. A static IP is required for the machine. When data comes back to the machine it passes through a firewall, and without a fixed address the firewall has no way to route it. VPOS Media devices support either DHCP or a static IP. DHCP is the default, and you change it from the device menu.1
Open the Technician Menu
Tap the top-left corner of the screen repeatedly until the menu appears,
then select Technician Menu and enter the code. The default code is
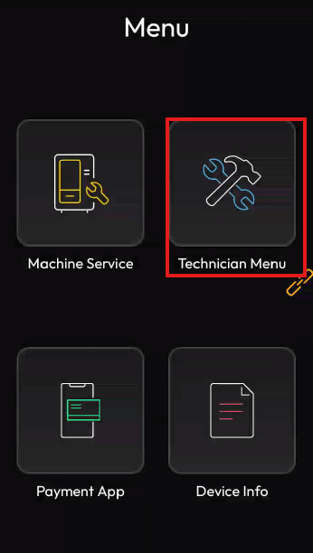
123123.2
Go to Communication
Scroll down to the Communication section.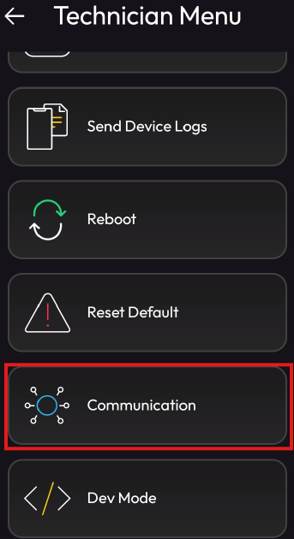
3
Select Your Connection Type
Open Wifi or LAN, depending on how the device connects.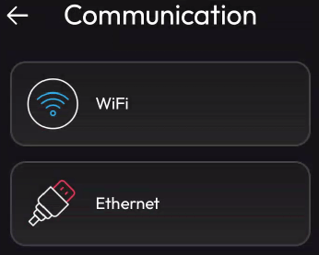
DHCP by default and can be
changed to Static.
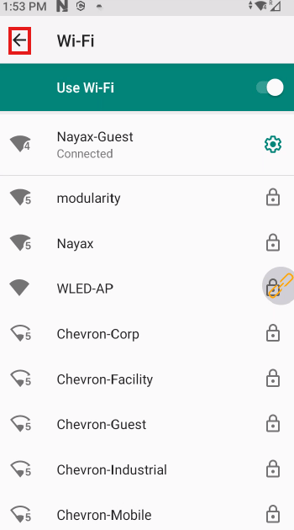
Configure Wi-Fi
Select the gears icon next to the relevant network.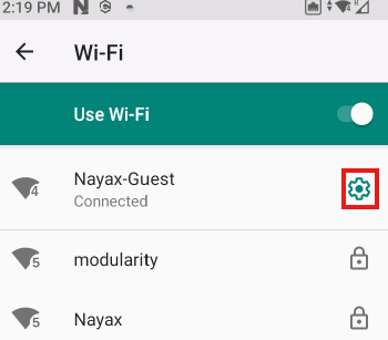
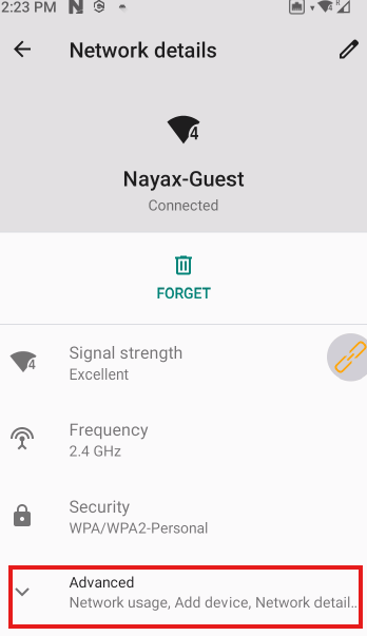
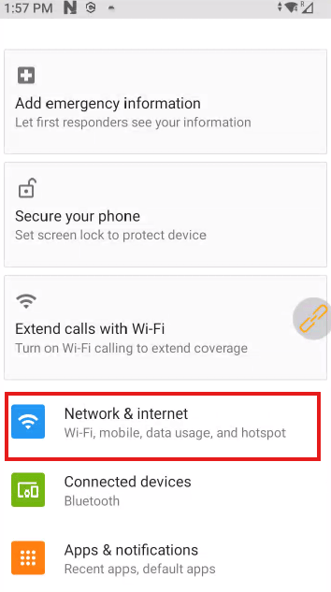
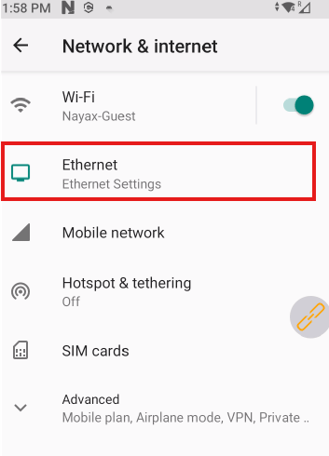
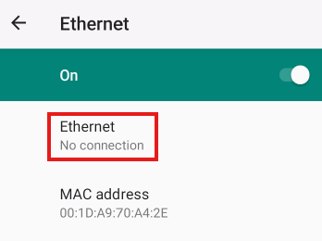
Configure Ethernet
The steps differ between the two VPOS Media models. On VPOS Media 4S, select the Ethernet option directly. The device prompts you to enable the Ethernet connection and edit its settings.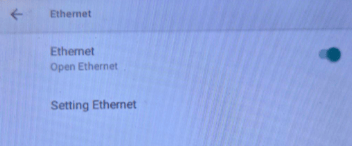
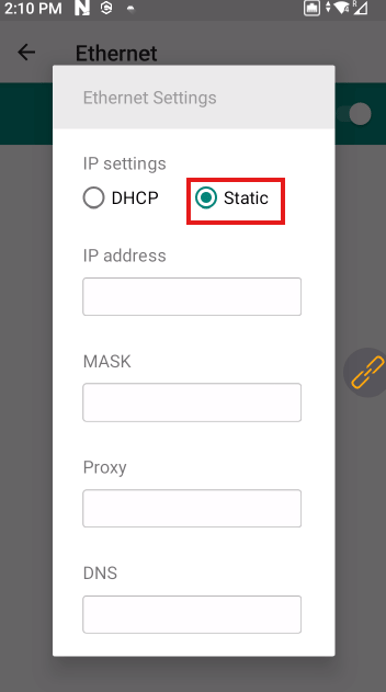
Use Ethernet for Both the Peripheral and the Servers
The supported Ethernet setup is a single connection that carries traffic to the Marshall peripheral and to the Nayax servers at the same time. Providing access to the outside world in parallel with the peripheral is the router’s job.Keep Cellular as a Fallback
Even when a machine is planned around Ethernet, leave the SIM card installed and the antenna connected. Ethernet connections have caused intermittent problems for many customers, and with the SIM in place the VPOST or Onyx falls back to cellular when that happens.Next steps
Set Up Nayax Core for Marshall Integration
Configure the machine model, timeouts, and payment parameters in Nayax Core.
Marshall Firmware Updates
See how the update runs on each device model and how long it takes.