

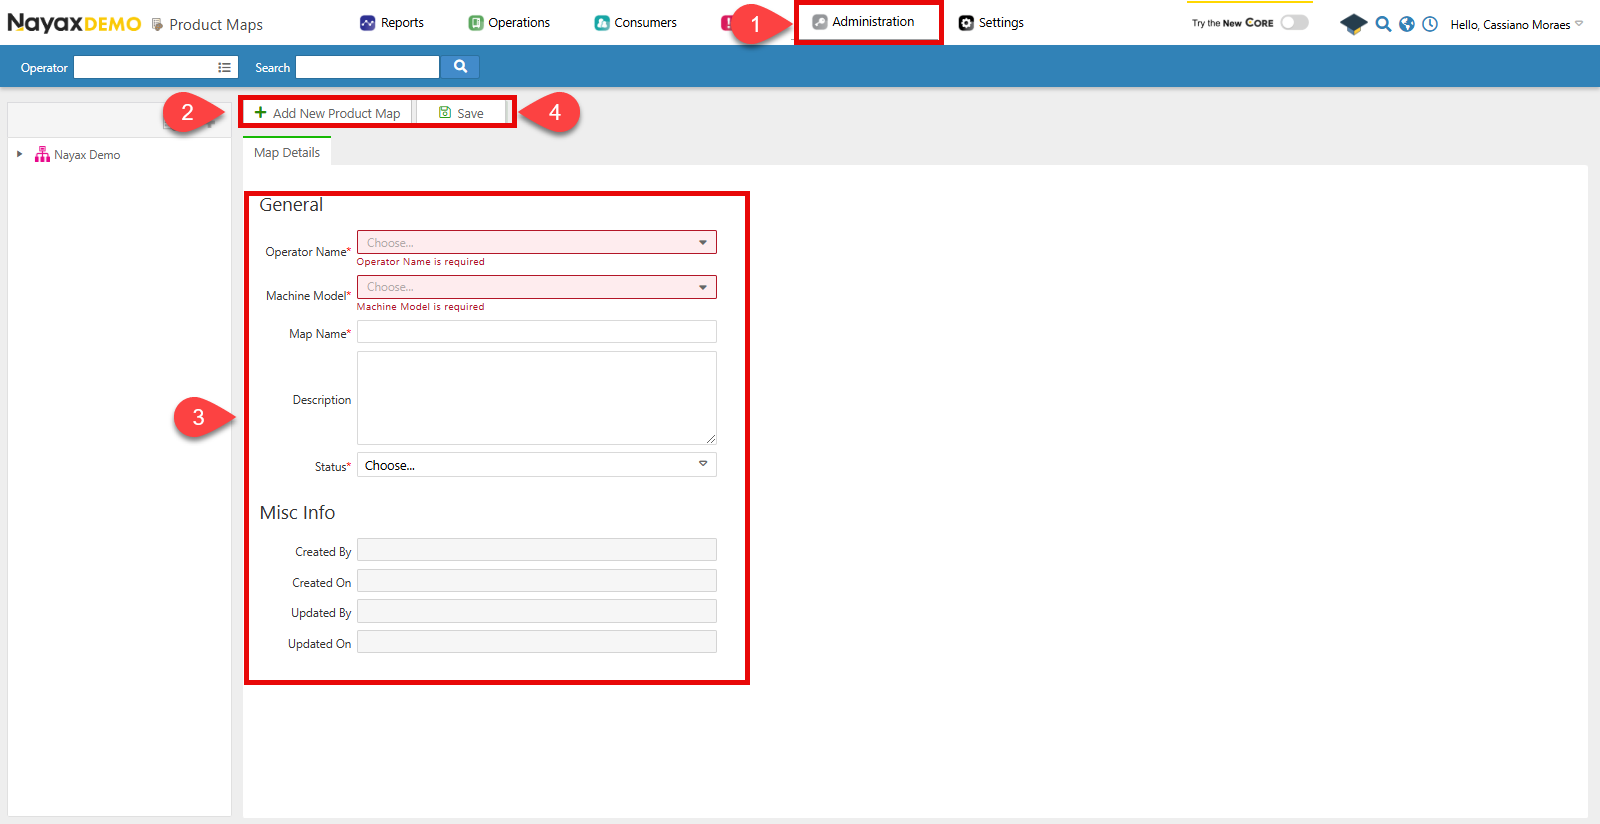
- Go to Administration > Product Maps.
- Click Add New Product Map.
- Fill in the required fields for the product map:
- Operator Name: Specify which operator the map belongs to.
- Machine Model: Select which machine the map is for.
- Map Name: The name of the product map.
- Status: Whether the map is active or not.
- Click Save.
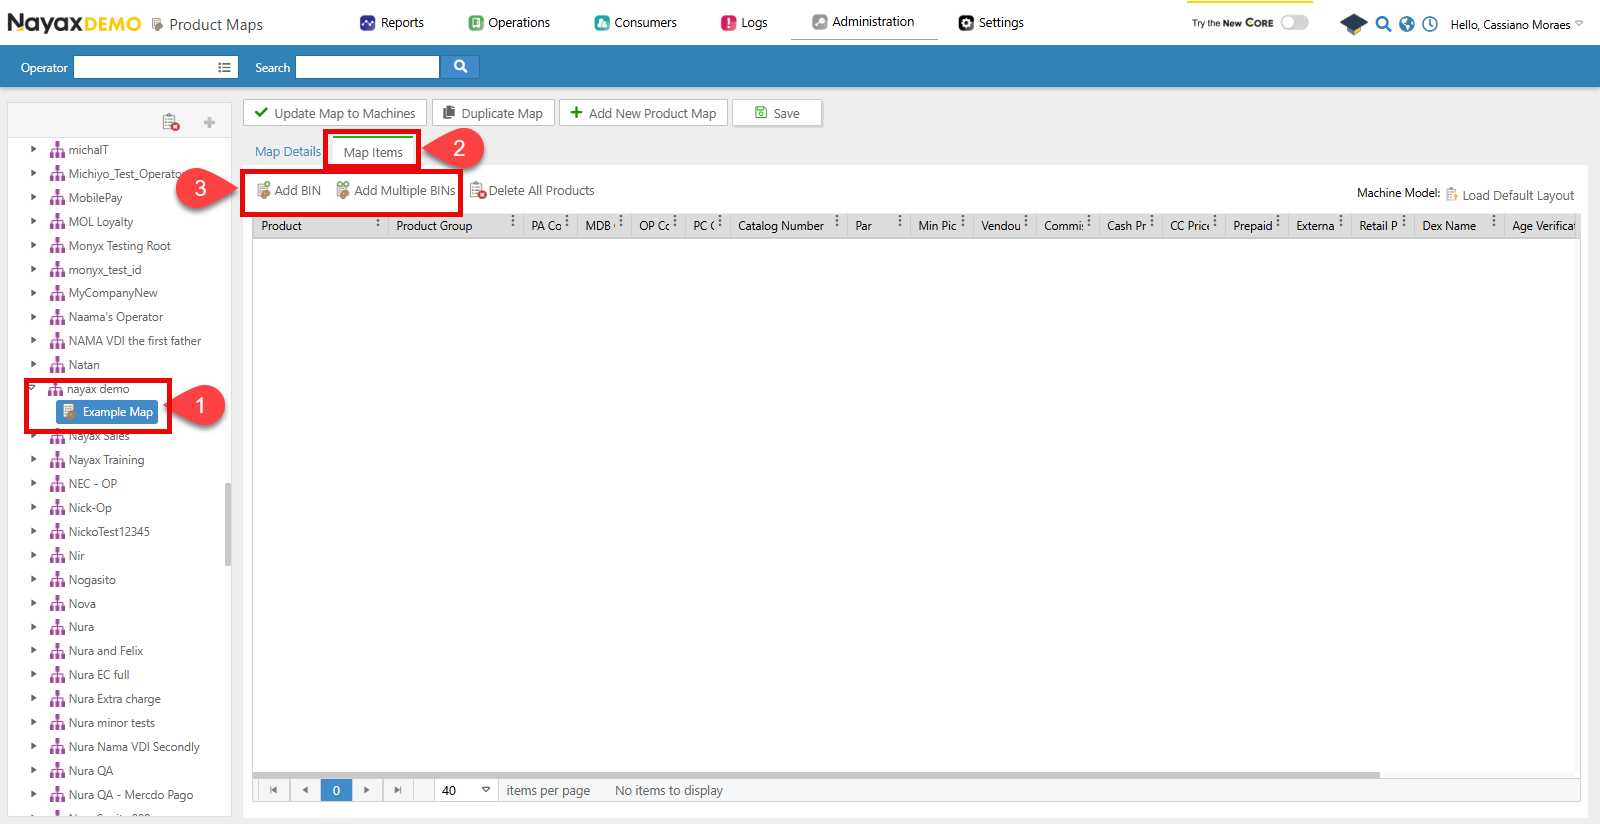
- Select the map from the list.
- Click on the Map Items tab.
- Add products to the map using one of the following options:
- Add BIN: Adds one product directly to the list.
- Add Multiple BINS: Opens a pop-up window to select multiple products at once.
Add a machine product via API
Use the Create Machine Products endpoint to add one or more products to a machine’s product map programmatically.Send a POST request with the
MachineID as a path parameter and an array of product objects in the request body:
Request
Path ParamsChange the
MachineID with the unique identifier of the machine to map its products.
After mapping products to your machines, you’re ready to generate pick lists.