

Connecting the device to your POS/ simulator
To establish a link with the device, TCP protocol should be used through port 5050 (no physical connection to your computer is required). Regarding the setup of your device’s Wifi/LAN connection to your local network, please refer to the following resources: Wifi connection: https://devzone.nayax.com/docs/integrate-pos-device/marshall-pro/faq#configuring-wifi-and-ipLAN connection: https://devzone.nayax.com/docs/integrate-pos-device/marshall-pro/faq#configuring-eth-and-ip
Activating the Device
The first step in activating the device is to scan the QR code displayed on the device’s screen using your phone’s camera. The following photo depicts a VPOSM4S device; however, the process is identical for the VPOSM5 device: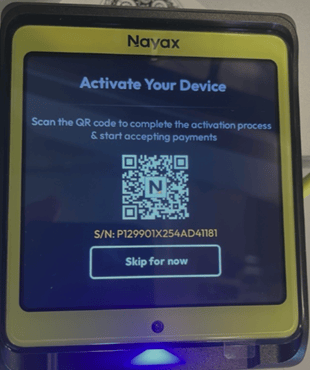
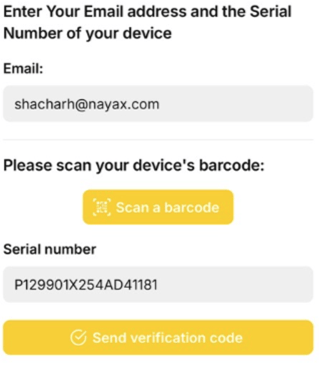
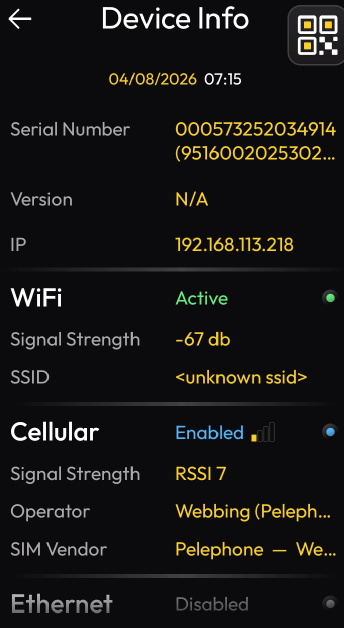
Getting the Device’s Details (Serial Number, IP)
First, set the device to “Out of Service” status by disconnecting the link to the device and waiting 30 seconds: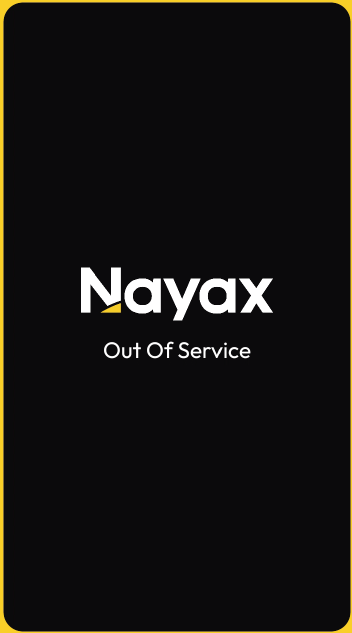
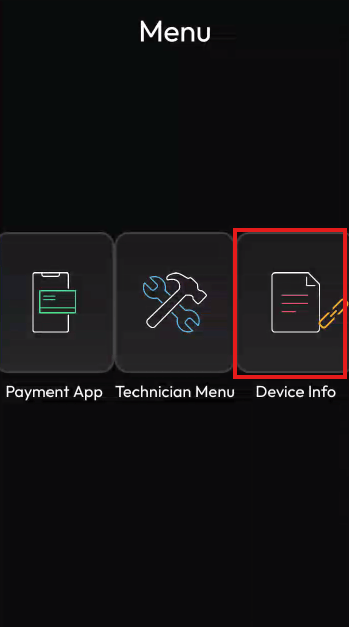
In this example, the device has an eSIM and it’s also connected to WIFI:
Configuring communication (Wifi / LAN)
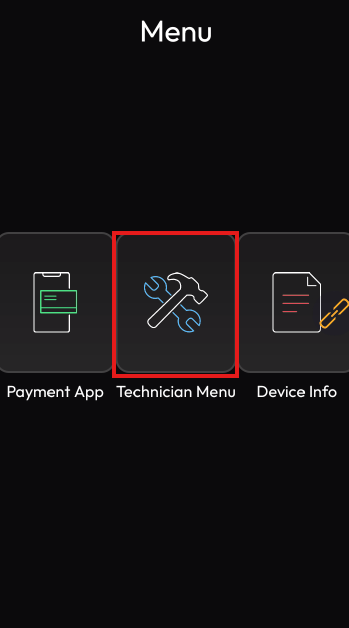
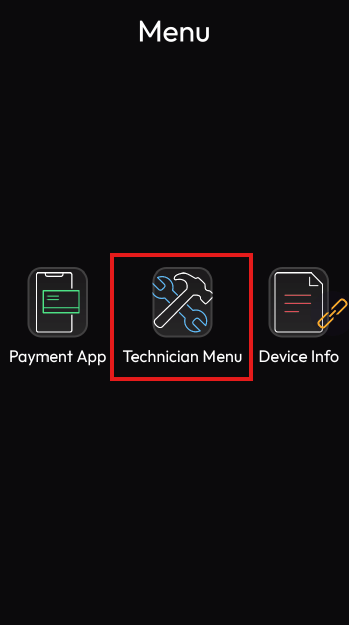
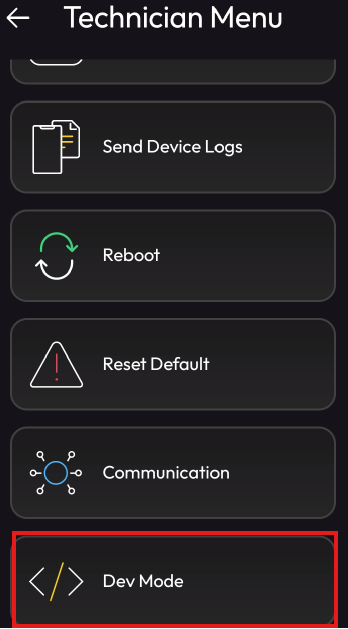
VPOSM over Marshall supports either DHCP or Static IP (depends how you want to work). DHCP is the default for the device, but it can be changed to Static IP from the device menu:click a couple of times on the top-left corner of the screen and select “Technician Menu”:
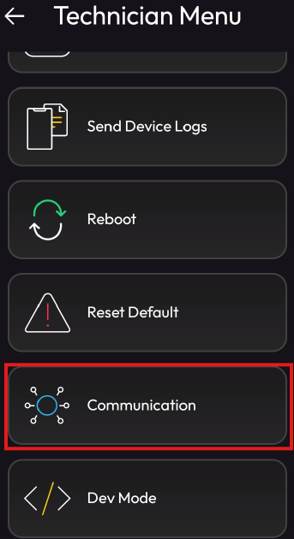
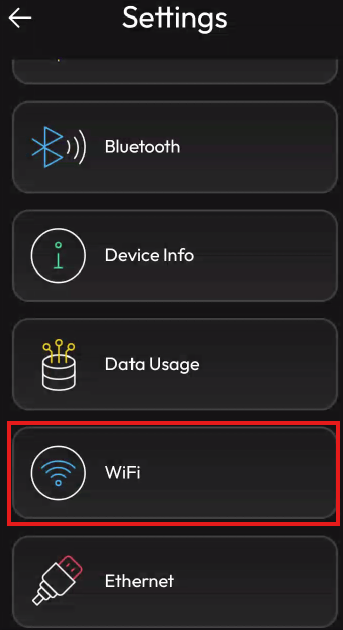
Then go into Wifi or LAN (depending on your connection type):
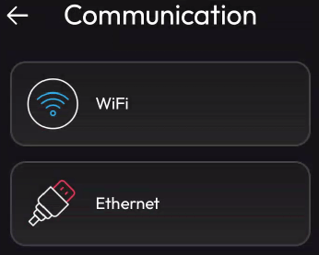
And into the desired network and edit its’ settings: go to the “Advanced” section and under it you’d see “IP settings”- which would be DHCP by default, or changed to “Static”.
Configuring Wifi (and IP)
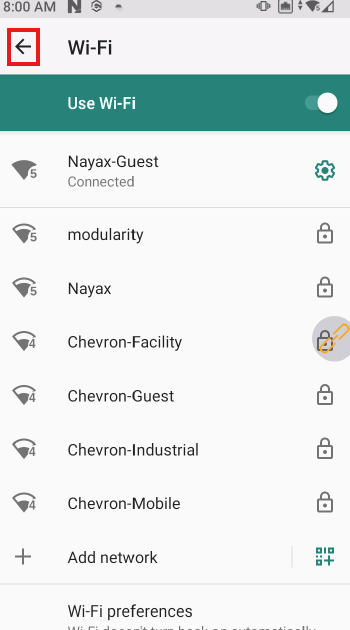
Click on the gears icon of the relevant network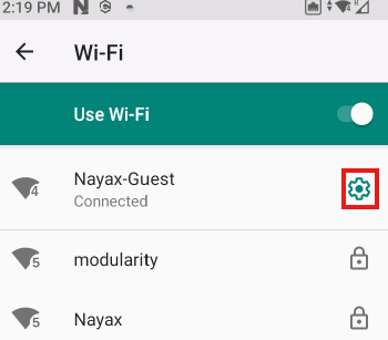
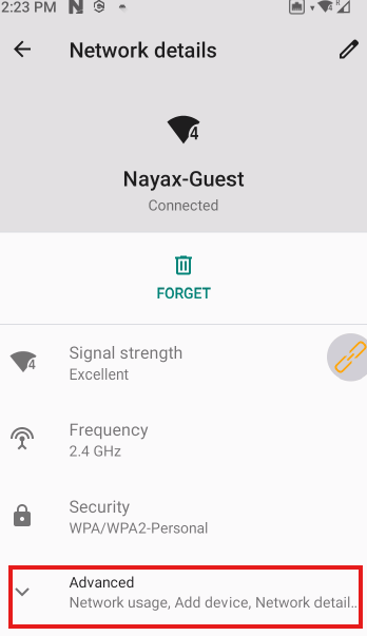
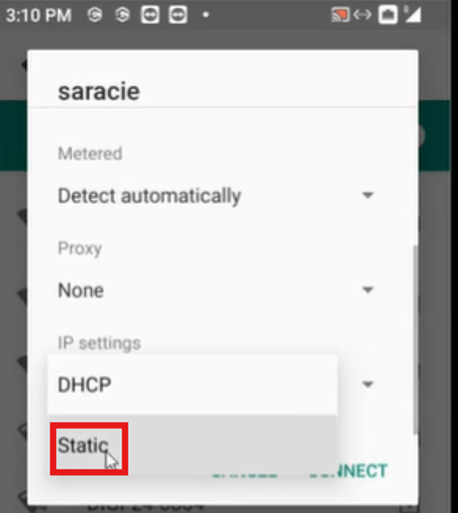
Configuring ETH (and IP)
On the WiFi settings screen, tap the back arrow at the top-left to return to the device’s system settings.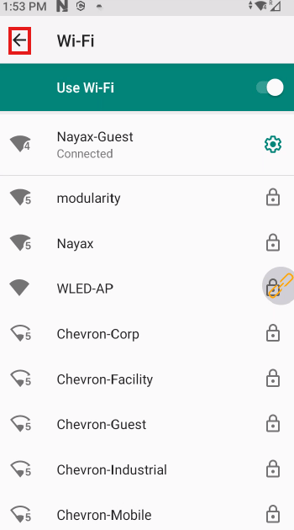
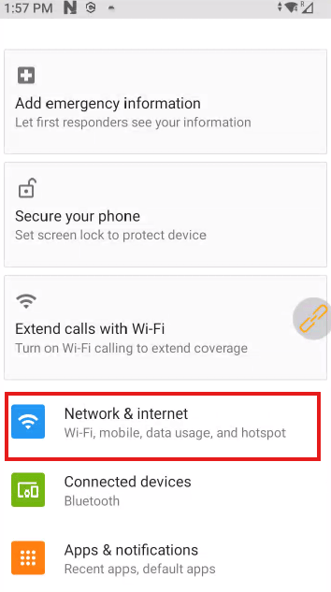
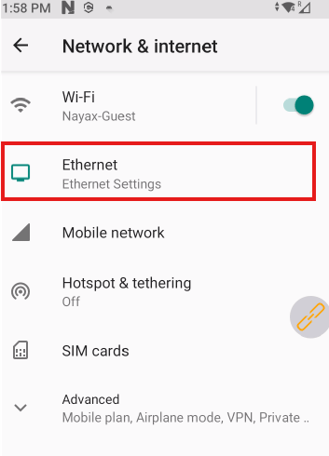
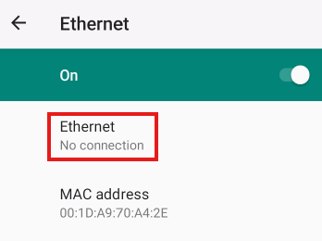
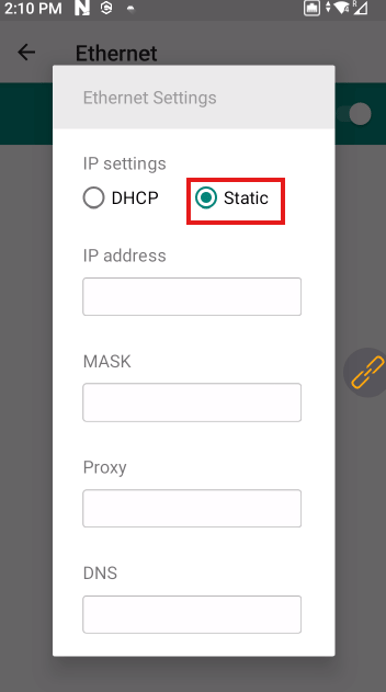
Firmware/ apps update process
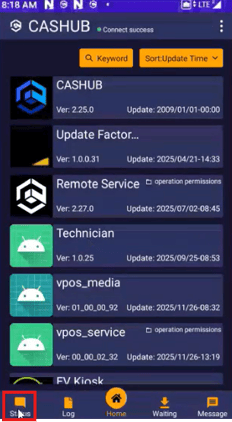
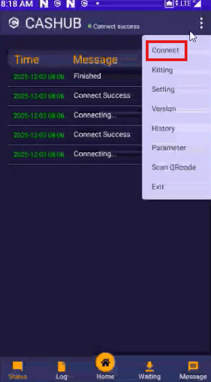
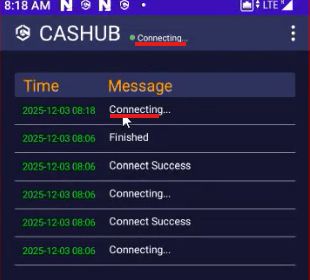
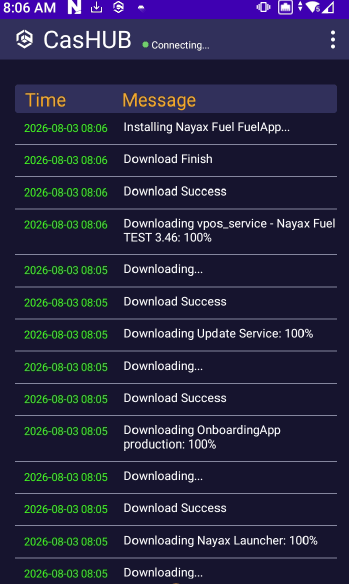
The firmware update is initiated from a separate platform called CasHub. The update process involves updating each relevant application individually, rather than as a single package. The firmware update for each application consists of two separate stages: download and update. Once the download process has been completed, Nayax Fuel’s Support team must send the device a request to initiate the update process for the desired applications. Alternatively, you may initiate this update process yourself, as described in the following section: https://devzone.nayax.com/docs/integrate-pos-device/marshall-pro/faq#triggering-apps-update-process-accessing-cashub%E2%80%99s-appTriggering apps update process (accessing CasHub’s app)
Once Nayax Fuel’s Support team has submitted the relevant app update request to the device, please turn on the device and proceed with one of the following two options:- Leave the device powered on overnight: it will reset automatically at approximately 3-4 AM, at which point the updates will be collected and initiated.
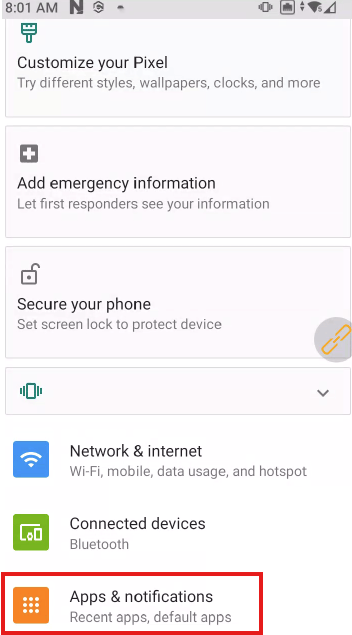
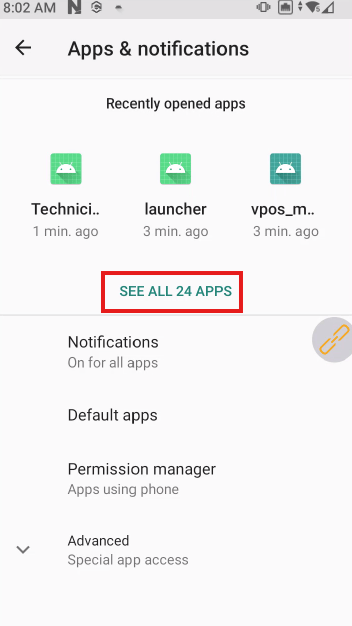
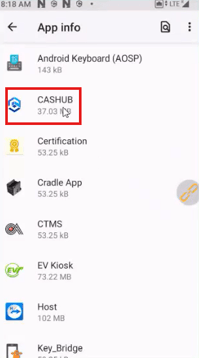
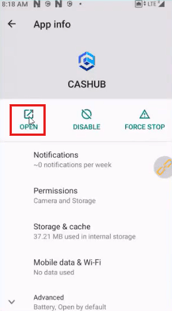
- Manually access the CASHUB app to trigger the download and installation of the updates.
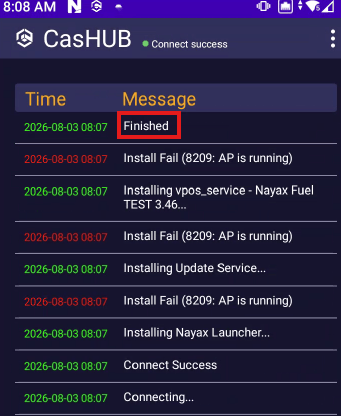
- Nayax Launcher
- Update Service
- VPOS Service
During this process, a “Castles: Updating (application)” notification will appear for approximately one minute.
Note- “vpos_media keeps stopping” errorIf you receive this error, this is due to the Vendapp crashing, an application not relevant to your needs. This can occur if the Vendapp is set as the default application:
If the parameter is correctly set to Fuel:
If the parameter is correctly set to Fuel: